Express Angular2 Application Using Typescript [ Server setup ]
- Introduction
- Pre-requisites
- Project Initialization in VS Code
- Get a simple ExpressJS server up and running
- Conclusion
- References
Introduction
Documenting the steps which I had to go through inorder to get an Angular2+ExpressJS+Typescript application up and running using Visual Studio Code. The final project will be made available as a seed project in github.
https://github.com/rmchndrng/XprssNg2TSSeed
Pre-requisites
- Visual Studio Code
- NodeJS
- NPM
- Typescript
Project Initialization in VS Code
Create a folder with the name of your project (eg:XprssNg2TSSeed)
Open the project in VSCode.(ie. Open the folder in VSCode)
It is always useful to open the terminal/cmd along with it, since we will be running many command line tools to get the tools and packages required for the project.
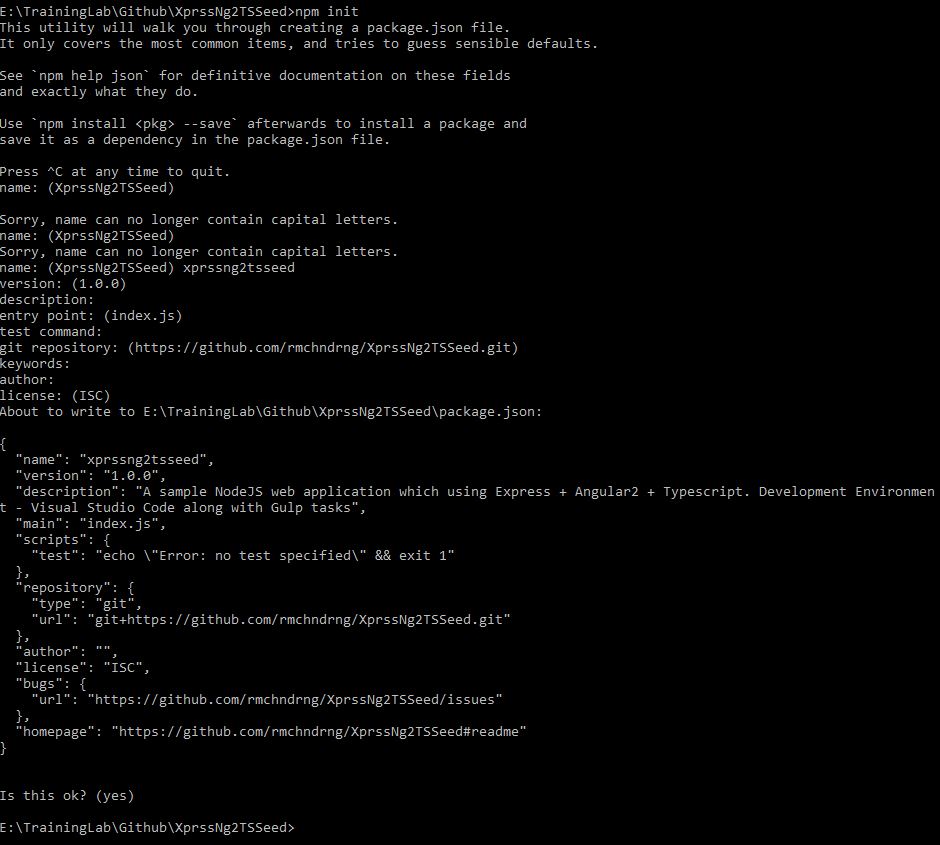
Initialize the project for NPM
npm init
This will initialize the package.json which will be used by npm. You can provide the values as they are prompted or continue with the defaults.(By pressing Enther key)
Get a simple ExpressJS server up and running
Install ExpressJS
Using npm install express node module.
npm install express --save
“npm install” command will download the package and its dependencies from the repository and place it inside “node_modules” folder. “–save” parameter will add the installed package as a dependency into the package.json config file.
Install Typescript and Typings
Since our goal is to develop the application using typescript, we need to install typescript and typings.
npm install -g typescript --save-dev
npm install -g typings --save-dev
This will install the node package “typings”. “-g” parameter will add the package to the global node package registry on the machine. “–save-dev” parameter will add the package into devDependencies. (Development environment dependency) in package.json. (Meaning, the package will be installed locally when we run “npm install” on the project)
“typescript” transpiles/compiles the Typescript we write into javascript based on compilerOptions we specify.
“typings” help us to manage type definitions for all the modules we are going to use. (“tsd” has been deprecated”)
Typescript Initialization
Create a folder by the name “server”. This will hold all the NodeJS server code.
cd server
typings init
This will initialize the folder for typings with “typings.json” config file.
Add a new file by the name “tsconfig.json”. This file will hold the configuration used for compiling typescript.
server/tsconfig.json

{
    "compilerOptions": {
        "target": "ES5",
        "module": "commonjs",
        "noEmitOnError": true,
        "noImplicitAny": true,
        "experimentalDecorators": true,
        "sourceMap": true
    }
}
“tsconfig.json” is a first class citizen in VS Code, allowing it to configure tasks to build the project easily. VSCode Task configuration
Since our project is going to hold both server side code as well as client side logic, the settings will vary for each compilation. So we have to make use of gulp tasks to achieve the desired compilation.
Install ExpressJS type definitions
typings install express --ambient --save
This will install type definitions for express and add it as a dependency (“–save” parameter) in the typings.json file. “–ambient” parameter will install the type definition as an Ambient type definition.
A type definition can be of 2 types 1. Ambient - Type definitions contain only declarations and exports of all the methods and properties available for the package. This is mainly because of the fact that the package was originally written in javascript. 2. Non-Ambient - Type definitions comes as part of the package which will contain the actual types. This is specified using the “typings” property in package.json. For more details refer here
HelloWorld Server
A simple HelloWorld express application will look like this. (Click here)
var express = require('express');
var app = express();

app.get('/', function (req, res) {
  res.send('Hello World!');
});

app.listen(3000, function () {
  console.log('Example app listening on port 3000!');
});
Inorder to achieve the same using typescript, we will add the following files.
server/serverApp.ts
import * as express from 'express'
export class ServerApp {

    private _App: express.Express;

    constructor() {
        this._App = express();
    }

    public setRoutes() {
        this._App.get('/', this._RenderHelloWorld);
    }

    public startServer() {
        this._App.listen(5000, function () {
            console.log('Example app listening on port 5000!');
        });
    }

    private _RenderHelloWorld(req: express.Request, res: express.Response) {
        res.send('Hello World!');
    }
}
server/index.ts
import {ServerApp} from './serverApp'

var serverApp = new ServerApp();

serverApp.setRoutes();

serverApp.startServer();
ERROR - Typescript compilation errors shown
At this stage, there will be typescript compilation errors in our serverApp.ts file.
"Property 'get' does not exist on type 'Express"
"Property 'listen' does not exist on type 'Express"
"Property 'send' does not exist on type 'Response"
If you go to the definition of Express or Response in index.d.ts typing, you can see they are interfaces which extends core.Express and core.Response. “core” is being imported from “express-serve-static-core” module, which is shown as missing.

Reason
When we ran the typings install for express, the output would have been the following.

When you install any ambient typing, you might end up seeing “typings INFO reference Stripped reference “XXXX/xxx/d.ts” during installation from “YYYY”
Fix
We have to manually install the stripped references recursively.More Info
Running the following commands will fix our issue.
typings install express-serve-static-core --ambient --save
typings install node --ambient --save
typings install serve-static --ambient --save
typings install mime --ambient --save
Configure Task Runner for VS Code
To compile/transpile typescript, we will use “gulp” tasks.
A gulp task can be triggered from VS Code directly by configuring the Task Runner.
In VS Code,
Press Ctrl+Shift+B
This will show you the option to “Configure Task Runner”. Click on it and select the Gulp task runner from the list.
This will add a folder “.vscode” into our project containing a file “tasks.json”.
.vscode/tasks.json
{
	// See http://go.microsoft.com/fwlink/?LinkId=733558
	// for the documentation about the tasks.json format
	"version": "0.1.0",
	"command": "gulp",
	"isShellCommand": true,
	"args": ["--no-color"],
	"showOutput": "always"
}
Try running the task by pressing “Ctrl+Shift+B”.
[OUTPUT]
Running gulp --tasks-simple didn't list any tasks. Did you run npm install?
Local gulp not found in e:\TrainingLab\Github\XprssNg2TSSeed
Try running: npm install gulp
gulp installation
Run the following command in the project root folder.
npm install gulp -g --save-dev
Try running the task by pressing “Ctrl+Shift+B” again.
[OUTPUT]
No gulpfile found
Add gulpfile.js
In the project root folder and a gulpfile configured with the tasks required.
The current task at hand is to compile all the typescript files inside the folder “server”
xprssng2tsseed/gulpfile.js
var gulp = require('gulp');
var ts = require('gulp-typescript');
var path = require('path');
var sourcemaps = require('gulp-sourcemaps');

gulp.task('build:server', function () {
    var tsProject = ts.createProject(path.resolve('./server/tsconfig.json'));
    var tsResult = gulp.src([
        'server/**/*.ts',
        '!server/typings/browser/**/*.ts',
        '!server/typings/browser.d.ts'
    ])
        .pipe(sourcemaps.init())
        .pipe(ts(tsProject))
    return tsResult.js
        .pipe(sourcemaps.write())
        .pipe(gulp.dest(path.resolve('./server')))
});

gulp.task('build',['build:server']);

gulp.task('default', ['build']);
To achieve this task, we will make use of some other packages.
gulp-typescript - A typescript compiler for gulp with incremental compilation support.
npm install gulp-typescript --save-devgulp-sourcemaps - Source map support for Gulp.js
npm install gulp-sourcemaps --save-dev
Successful Build
Now try running the task by pressing “Ctrl+Shift+B”.
[OUTPUT]
Using gulpfile e:\TrainingLab\Github\XprssNg2TSSeed\gulpfile.js
Starting 'build:server'...
Finished 'build:server' after 1.2 s
Starting 'build'...
Finished 'build' after 15 μs
Starting 'default'...
Finished 'default' after 6.53 μs
As a result, the compiled javascript files with sourcemaps concatenated would been generated besides the typescript files. 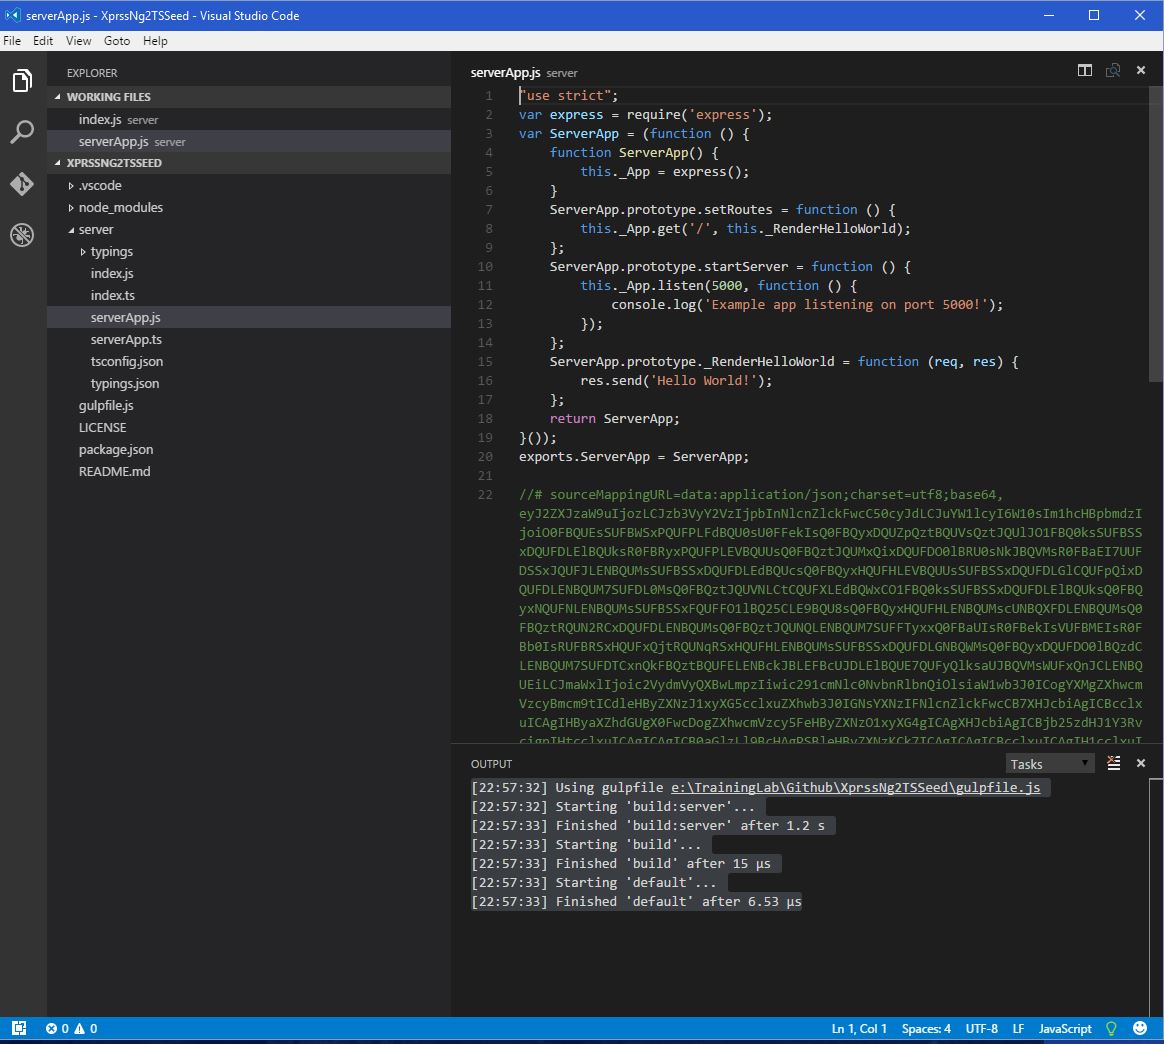
Hide compiled javascript files from VS Code file navigation
We generally do not want to see or manupulate the typescript compiler generated javascript. So it will be very helpful during development to hide them. This can be achieved by adding workspace level setting in VS Code.
Open the Command Palette [Ctrl+Shift+P]. Search for “Workspace” and select “Preferences: Open Workspace Settings”.
Add the following in the file and save.
.vscode/settings.json

// Place your settings in this file to overwrite default and user settings.
{
	"files.exclude": {
		"**/.git": true,
		"**/.DS_Store": true,
		"**/*.js": { "when": "$(basename).ts"},
		"**/*.js.map": true
	}
}
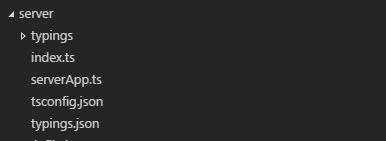
Now all the javascript files with same name having extension “ts” will be hidden from the workspace.
Run the application
Open command window in the “server” folder and run
node index.js

Open your browser and navigate to localhost:5000
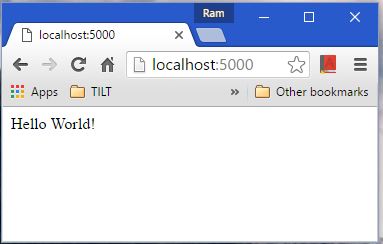
Conclusion
The HelloWorld ExpressJS application using Typescript is up and running…
TODOs
In the following journals, I will try to document the steps to achieve the following goals.
- Angular2 Application Setup.
- Workflow to share Typescript code across Server and Client applications.
- Incremental compilation and Live reloading of the application.
- Debugging the ExpressJS Server application using VS Code
- Debugging the Angular2 Client application using VS Code